

I have recently assisted a few schools to get their shared iPads prepared for their students. Although quite familiar with Apple Configurator 1, the change to Apple Configurator 2 has thrown out a few 'gotchas'. I have included my notes below. I hope it helps.
Quick guide to Apple Configurator 2 (AC2), and changes to look out for if upgrading from Apple Configurator 1 (AC1).
- If you want to use iOS 9 - you will have to sync with AC2.
- If you need AC2, you must download the latest Mac OS X ‘El Capitan’ from the App Store via the Apple menu on your Mac.
- You can only acquire app licenses in bulk from the VPP store, even licenses for free apps must be acquired first.
- No more adding apps in bulk from your Mac’s iTunes library! (You can do this, but the end user must authenticate to App Store on each iPad)
- Configuration files from AC1 will work with AC2.
Step 1 - Acquire the apps from VPP
- Login to apple education VPP with your usual credentials: https://volume.itunes.apple.com/au/store
- Search for the app that you want to add to your managed iPads.
- Make sure that you select the app from the “iPad apps” list and not the “Mac Apps” list. This is very important, especially if you are looking for iMovie or Garageband.
- Enter the quantity that you need. It may be cheaper to purchase 20 apps due to the heavy discounts, even if you only have 10 iPads.
- If you are using the latest Apple Configurator 2 (which you are), you need to be sure that the “Distribution Type” is “Managed Distribution”. If you are purchasing a free app, you only have this choice.
- Click Review Order then Place Order, do this for each app that you require. We are now done in the VPP store.
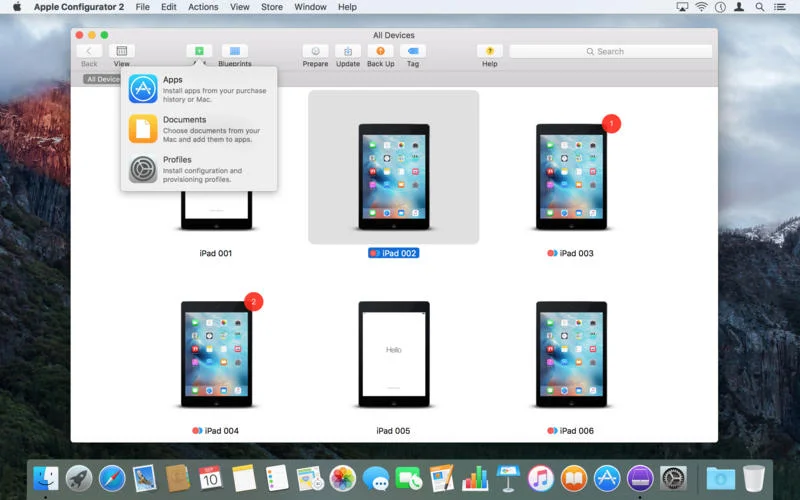
Step 2 - Add the apps to multiple iPads
- Open Apple Configurator 2
- In the top menu click Store and sign in with your VPP account details.
- Plug in one or many iPads. You may choose to Prepare the iPads and apply a config file. But for now just click Add and select Apps.
- Because you have signed into the App Store with your VPP details you will now see the apps which you have licenses for. Remember you must acquire licenses first, even for free apps.
- Do not click “Choose from my Mac”. This will give you the option to select previously downloaded apps from iTunes on your Mac. The problem being, when you launch these apps on the iPad the student will be required to enter the Apple id from your iTunes account (not practical if you you have many iPads).
- Select the app icons that you want to add, and click Add. The apps will be downloaded each time you sync new apps. So if you have 20 iPads, but can only sync 10 iPads at a time, the app will need to be downloaded twice. Frustrating if you have poor or limited internet connection.
- The apps will be installed on your iPads ready for use.